CANON PIXMA 5000 A/C POWER SUPPLY

len67

Distinguished
May 5, 2010
1
0
18,510
I HAVE A PERFECTLY GOOD AND CLEAN PIXMA IP 5000 CANON PRINTER, LITTLE USED ,BUT REALLY EXCELLENT PHOTO PRINTER.
PROBLEM IS THE A/C (240 VOLT A/C ...UK MODEL) HAS FAILED.

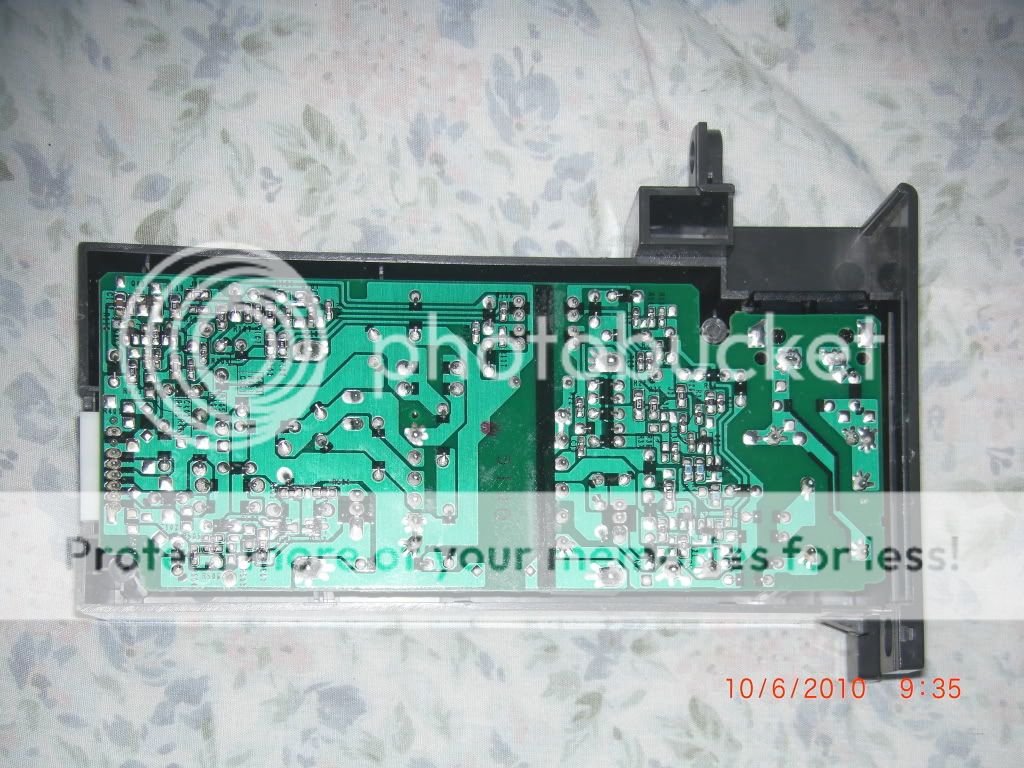
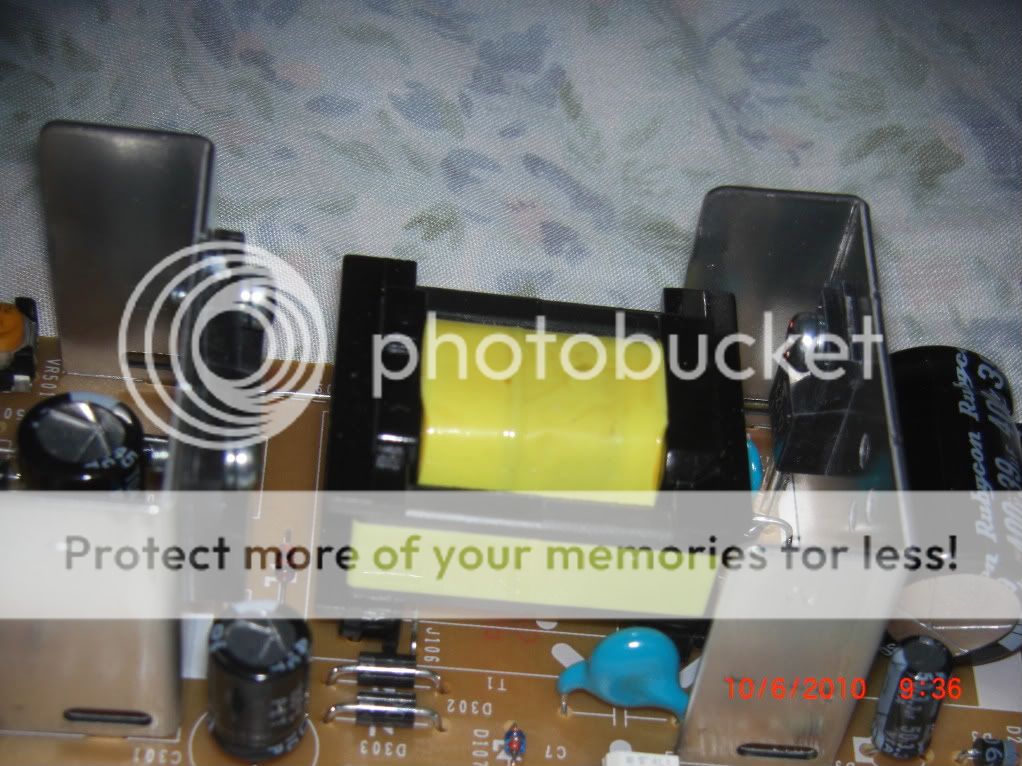
THIS IS THE SNAP-IN POWER ADAPTER WHICH TAKES THE FIGURE 8 POWER CORD FROM THE MAINS SUPPLY.

IT SIMPLY PUSHES IN AND IS HELD IN BY TWO LIPS .

DOES ANYBODY KNOW WHERE I CAN BUY A REPLACEMENT UNIT?.....OR DOES ANYBODY HAVE DEAD PIXMA IP5000 PRINTER WHICH HAS THIS THIS UNIT STILL INTACT AND IS WILLING TO SUPPLY???


I LIVE IN HOPE AS CANON,(BLESS THEM WILL NOT SUPPLY ME AND OFFER NO HELP) ONLY ,...SURPRISE!!, SUGGEST I INVEST IN A NEW CANON PRINTER WITH HELP FROM THE INTERNATIONAL MONETARY FUND

LEN
 
G

Guest

Guest
Car Boot sale is my best source of stuff like that.

Canon have built all in one printer scanners for other brands like Dell and I've seen one using a similar sounding power supply unit.
 

ElectroBear

Distinguished
May 23, 2010
6
0
18,510
I still have a perfectly good PIXMA IP 3000 Canon Printer that suffered a power spike which blew the 240V AC power supply (popped a fuse and a capacitor).

Open the power unit (one small screw) and the board comes out very easily. Have a look for damaged components. Check the capacitor (marked 'C2') and the Radial Lead Fuse (marked 'F1'). Also possibly check the Power Transistor (marked 'Q1'). These components can be replaced at minimal cost and the power supply can be repaired.

My problem was the capacitor (22uF 400v) and the Fuse (T1.25A 250V).

Hope this helps!

Paul
 

aussietom

Distinguished
Jun 7, 2010
12
0
18,510
Hello Paul,
Ihave the same problem with the iP5000, it just will not turn on and there are no lights or any sign of life. I removed the power supply by pressing the two lips but there is no screw I can see to open it. There are two screwheads that are of a kind that I do not know, six indentions around a flat head. How can I open it without breaking the case please?
Thank you
Thomas
 

ElectroBear

Distinguished
May 23, 2010
6
0
18,510
Hi Thomas

No one regular screw? Well, maybe they now make the unit more sealed. :(

I used a Dremel with a cutting wheel to open the case on a Lexmark power supply (where the two halves are glued together - it can then be re-glued {with epoxy} again.)

You can also use the Dremel with a small cutting wheel to cut a slot in the head of those proprietary screws to take a regular screwdriver. (I have done this on many occasions with those screw heads)

It just might be worth checking if Canon in your country supply new power units.

Hope you get yours fixed! ;)

Paul
 

aussietom

Distinguished
Jun 7, 2010
12
0
18,510
Hello Paul,
I used a side cutter to cut a paperclip into six small portions and soldert them onto a nail-head. This was sufficient to open the two screws I mentioned (flat head with six small indentations around the head) So I was able to open the case, the circuit board has markings:
PCPA0030 and MPA3401 and containes several electeonic components like capacitors, resistors ETC and all look perfectly alright. There is no official sign of some heat problem or such, I noticed that when I connect the figure 8 power coard to the computer I can hear a very faint clicking sound like when a spark flies.
Does this help? I asked Canon support for help and was told that there are no user fixable parts and I have to give it to a Canon support centre. Knowing that the hourly rate is somewhat A$80.00 and that could charge whatever they like for the repair it seems cheaper to buy a new printer and throwing thisone on the heap.
Hope you can help me,
Thank you
Thomas
 

ElectroBear

Distinguished
May 23, 2010
6
0
18,510
Hi Thomas
Great idea with the 'paperclip screwdriver'! ;)

The clicking could be a short-circuit protection scheme and shows that the primary circuit is operating properly. (so possibly not the transformer)

Are you able to post a photo of the circuit board?
Cheers!
Paul
 
G

Guest

Guest
Post the picture on a site like PhotoBucket (or even Facebook) and add a link to it in your next post here
 
G

Guest

Guest
I think you copy and paste the picture's address from the browser address line at PhotoBucket and paste it into your post here. Otherwise (as with Facebook) there should be an item on the menu/page when you're in PhotoBucket
 

ElectroBear

Distinguished
May 23, 2010
6
0
18,510
Hi Thomas

Sorry, been away for short break.

CIMG2060.jpg


Is the fuse (little maroon thing - top left - just behind the power socket ) still good? (not open circuit)

Is the large capacitor still good when checked with a multimeter? ( Big black cylinder labeled 'Rubycon - 400v39µF')

Also, do you get readings on the multimeter when checking the coil (copper windings - bottom left) and primary side of the transformer (yellow wrapped - bottom centre) ?

EDIT: I am posting your other photos as the links you supplied above do not qiute work.

CIMG2059.jpg

CIMG2061.jpg
 

aussietom

Distinguished
Jun 7, 2010
12
0
18,510
Thank you, I did not recognise this to be a fuse. I always thought fuses are made from a glass tobe with a wire in it, obvious when they are broken. Got to go to town to get my hands on a multimeter.
till then
Thomas


aussietom

Distinguished
Jun 7, 2010
12
0
18,510
This 'fuse' is not available at Jaycar or Dick Smith. I looked for it at the internet and found one for US$20.00, are those fuses so expensive? Could I just change it and solder a fuse-holder for a normal fuse into it.
 

ElectroBear

Distinguished
May 23, 2010
6
0
18,510
Hi Thomas

I am posting a picture of the parts I replaced on my board. The capacitor is slightly different, but the micro fuse should be about the same. It is a type TR5 - 1.25A Micro Fuse. It is a 'slow-blow' fuse, indicated by the 'T' (Time-lag) in front of the 1.25A. That type of fuse is NOT that expensive. You could replace it with another type of fuse, but just ensure that it is about the same power rating.

Cap_Fuse.jpg


Note the top of my capacitor is a little proud... on it's way to popping and therefore I replaced it. (cheap enough)

If you replace the capacitor, just be sure to observe the polarity (indicated by the stripe with '0' (negative) on it) and solder the new one the same way round.
 

aussietom

Distinguished
Jun 7, 2010
12
0
18,510
Not proud to admit it, as a problem seeking solution I temporary 'bypassed' the fuse by soldering a small copper wire on the bottom of the circuit board and it still does not power up. This means I can save US$20.- by not buying the fuse but I still no not have a working printer.