Given the frequent questions on putting together components for a 4k capable PC build, thought I would share how mine turned out and a few notes on challenges and how they were resolved. Here are the parts choices I made:
New
Phanteks Eclipse G500A Mid Tower Case, DRGB
Additional Phanteks 140 fan for exhaust
Seasonic Vertex GX-1000 PS
ASUS ROG Strix B650E-E Gaming WiFi
AMD Ryzen 9 7900X
EK Nucleus AIO CR360 Lux D-RGB
G.Skill Trident Z5 NEO RGB Series (AMD Expo) 32GB DDR5 6000 CL30-38-38-96 F5-6000J3038F16GX2-TZ5NR
Solidigm™ P44 Pro Series 2TB PCIe GEN 4 NVMe
Carried over from old setup
Nvidia RTX 4080 FE
Samsung 32" Neo G7
HGST 4TB Hard Drive
Parts
As far as components, I have been pleased with each choice so far. I had been waiting for some time to see how the 7800x3d tested out, and had time to think about what I wanted and why. I like to game at 4k, though I need a "balanced" rig so all round performance is a priority. I generally go for high end, but not "halo" level horrible bang for the buck parts. The 7900x just had a price drop from $550 to $423.
Considering the higher overall application grunt of it's 12 cores vs. the 8 core 7800x3d, and the very small differences in gaming at 4k - even the 7950X3D is within single digit FPS of the 7900X - I decided it was the ticket for me. It can be tuned down to non "X" 7900 efficiency or up to overclocked levels if needed.
I went a bit overboard on the power supply than what was required, but I have always thought of the PS and the motherboard as the true heart of a system and both last me through at least one or two CPU upgrades if chosen wisely (a key reason I went with an AM5 route). Beyond the confidence of plentiful, clean, and stable power, I did love getting rid of that horrible three headed Hydra of a 12VHPWR adapter cable.
The Strix B650E-E was likewise more expensive than some alternatives. It was the board that had the key features I want such as a well designed Bios, Bios flashback and clear CMOS on the rear, an LED that generates error codes, great VRM's, and solid overall quality. My no freeze or crash experience so far reinforces that it is well engineered for a new platform.
The EK Nucleus AIO CR360 Lux D-RGB has really made an impression with reviewer/testers in short order. It's beating all the competition in temps and it has an EK designed pump - by folks who have a long lineage in watercooling. Not using an Asetek pump is a big plus to me.
The F5-6000J3038F16GX2-TZ5NR memory was chosen for it's fast timings and SK-Hynix chips. The EXPO II timings are good, though I plan to try tightening things up ala BuildZoid at Actually Hardcore Overclocking.
The Samsung 32" Neo G7 isn't a part of the "build" per se, but deserves mention because all the effort we put in to a PC in the end is experienced via what we see on our monitor. The NEO G7 has a Mini LED local dimming feature with 1,196 zones, which means HDR is better than about anything than an OLED screen - which I would not buy for a general use PC due to burn-in. The 165Hz refresh rate, deep blacks, excellent color gamut and accuracy, etc. are top notch. Some might not like the curved screen, and honestly if they had a same spec 32'' flat version I would have preferred that, but it really has not been a problem for me.
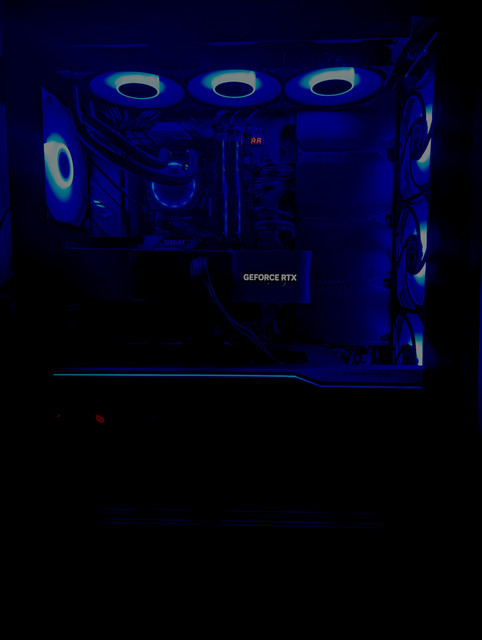
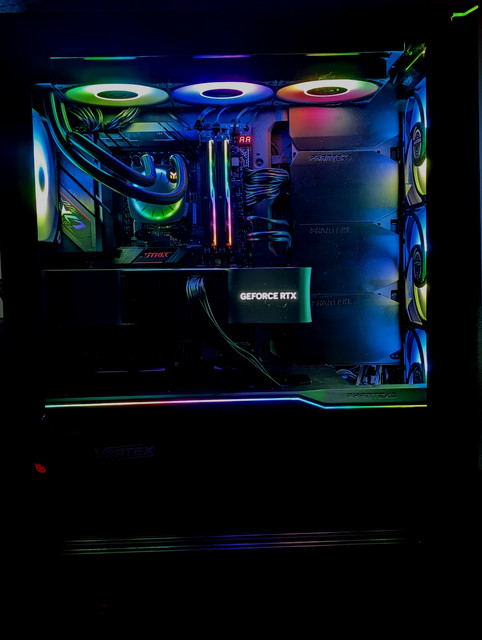
Assembly
The build itself was pretty straight forward, though I was surprised that the most time consuming issue was figuring out all the RGB cabling (Three RGB fans on the radiator, three more on the front of the case, one rear exhaust, one on the AIO pump, and 3 built into the case). I settled on eschewing use of the RGB controller included in the case, and going with everything connected to the motherboard. I still need to order an RGB splitter cable due to being one connection short of what could be accommodated even with daisy chaining and using all three Motherboard RGB headers. The built in case RGB strip LEDS are therefore not functioning till I get the splitter.
The G500A is quite easy to build with, it's the nicest case I have used. I appreciated the "no need for a sharp bend" space between the 4080 power cable and the front glass and the clever "hatch" with sliding cover for that cable to disappear into rather than the usual longer routing path of other cases. Though appearance has nothing to do with how well a PC functions, it is still a source of pleasure to those of us who are aficionados. I still need to get that final case RGB working, and do a final cable management (replace those bread bag twisty thingies with neat zip ties). Cable management is a non-issue with the depth available and the generous tie-down locations.
My best advice is to follow the woodworking axiom - "Measure twice, cut once". In other words take your time and think it through at each step. Most assembly errors can be fixed, though a ruined motherboard or CPU can be painful lessons.
Setup
After firing the rig up and booting to a USB stick to install Windows 11, I ran in to a dead end when the install routine could not connect to the internet and gave no options to proceed. I tried several things to no avail. Thankfully googled the solution on my phone, which was :
1. Use the “Shift + F10” keyboard shortcut.
2. In Command Prompt, type the OOBE\BYPASSNRO command to bypass network requirements on Windows 11 and press Enter.
3. Click the “Continue with limited setup” option.
I was surprised how quickly Windows installed from that point, and even more surprised that immediately upon Windows opening, the Asus "Amoury Crate" install window popped up offering to install the needed Intel LAN driver as well. Honestly, I may have not ever have installed Armoury Crate otherwise, assuming it was just another bloatware gimmick. After clicking to install, poof, the internet was connected, and Armoury Crate also had options to install/update all the other drivers (chipset, graphics, audio, wi-fi, and bluetooth) - as well as some options for useful utilities (I picked WinRAR, Two-way AI noise cancellation, and CPUID ROG CPU-Z).
Sure, I could have done all this manually the old fashioned way, but it really was slick and saved a ton of time. Beyond the initial setup assistance, I was impressed with it's monitoring and variety of other features. It also proved to be very handy as a controller for all the RGB and effects in a simple but useful interface.
After installing my most used applications, I was ready to begin setting up Steam and a bunch of games I had from my old rig on the trusty rusty hard drive. that proved to be another problem, as after doing the Steam " add another Library location" pointing to that drive, Steam would not find the gamed and despite repeated efforts, continued to show all my gamed as needing to be downloading and installed (which I did not want to go through with all the time and waste of bandwidth that entailed). After looking up several fixes (which included a laborious process such as modifying the Appmanifest file and individually identifying the Steam APPID number of each game), I decided to try a simple gambit.
Since Steam had created a new empty "Steam Library" folder on the drive, I deleted that, and renamed the folder containing my games to "Steam Library", and restarted Steam. It worked and all my games were ready to go.
I did subsequently relocate a few of my favorite games to the NVME drive to benefit from the very fast loading. For me, that currently includes Red Dead Redemption 2, Elden Ring, and Hogwarts Legacy.
Having things basically working, I ran Cinebench in conjunction with HWiNFO64 to monitor temps, core frequencies, voltages, watts, etc.. The results were pretty good, with a multi-core score of over 28,000. I was seeing thermal throttling. All in all not a bad start at all stock settings. I then flashed to the latest bios version, and tried going with the EXPO II memory setting, which should bump things up considerably to rated speed and timings. This booted and ran without a hiccup.
I then experimented with a few overclocking features (PBO, curve optimizer, and ECO modes) to see how each balanced performance, power consumption, and temps, Nothing I tried caused a crash at any time. I then went with the simplest overclock approach - just using EXPO II and setting Core Ratio to AI Optimized. The outcome was great - a combination of strong Cinebench Single Core (over 2000) and Multi Core (over 30,000) scores. Just as importantly, the temps were a bit lower (86.5 C), no thermal throttling and good voltages.
I have to give Asus kudos on just how smart that AI Optimized setting is, unlike manual overclock methods that tend to make you choose between single core or multicore performance, it's dynamic algorithms manage to to give you optimal level performance for both. Here is a YouTube link on the topic (Ignore that the title says ROG X670E - it's exactly the same with the Strix B650E-E):
How to use AI Overclocking on an ROG X670E Motherboard for Ryzen CPUs
Summary
You may have had the sinking feeling of disappointment and frustration when a new rig has failures to boot, system crashes, and underwhelming performance after spending hard earned money and all the time and effort in planning, ordering, assembling, and setting up. Fortunately, I am happy - very happy - with this PC. The general feel is perceptively quite snappy and responsive, and tasks seem to complete in no time. It rips through games at 4K like nobody's business with gorgeous visuals. And of course watching streaming like Netflix or ripped 4K content is a treat.
I hope these impressions and hands on thoughts are helpful to someone contemplating their next build. Have fun")
New
Phanteks Eclipse G500A Mid Tower Case, DRGB
Additional Phanteks 140 fan for exhaust
Seasonic Vertex GX-1000 PS
ASUS ROG Strix B650E-E Gaming WiFi
AMD Ryzen 9 7900X
EK Nucleus AIO CR360 Lux D-RGB
G.Skill Trident Z5 NEO RGB Series (AMD Expo) 32GB DDR5 6000 CL30-38-38-96 F5-6000J3038F16GX2-TZ5NR
Solidigm™ P44 Pro Series 2TB PCIe GEN 4 NVMe
Carried over from old setup
Nvidia RTX 4080 FE
Samsung 32" Neo G7
HGST 4TB Hard Drive
Parts
As far as components, I have been pleased with each choice so far. I had been waiting for some time to see how the 7800x3d tested out, and had time to think about what I wanted and why. I like to game at 4k, though I need a "balanced" rig so all round performance is a priority. I generally go for high end, but not "halo" level horrible bang for the buck parts. The 7900x just had a price drop from $550 to $423.
Considering the higher overall application grunt of it's 12 cores vs. the 8 core 7800x3d, and the very small differences in gaming at 4k - even the 7950X3D is within single digit FPS of the 7900X - I decided it was the ticket for me. It can be tuned down to non "X" 7900 efficiency or up to overclocked levels if needed.
I went a bit overboard on the power supply than what was required, but I have always thought of the PS and the motherboard as the true heart of a system and both last me through at least one or two CPU upgrades if chosen wisely (a key reason I went with an AM5 route). Beyond the confidence of plentiful, clean, and stable power, I did love getting rid of that horrible three headed Hydra of a 12VHPWR adapter cable.
The Strix B650E-E was likewise more expensive than some alternatives. It was the board that had the key features I want such as a well designed Bios, Bios flashback and clear CMOS on the rear, an LED that generates error codes, great VRM's, and solid overall quality. My no freeze or crash experience so far reinforces that it is well engineered for a new platform.
The EK Nucleus AIO CR360 Lux D-RGB has really made an impression with reviewer/testers in short order. It's beating all the competition in temps and it has an EK designed pump - by folks who have a long lineage in watercooling. Not using an Asetek pump is a big plus to me.
The F5-6000J3038F16GX2-TZ5NR memory was chosen for it's fast timings and SK-Hynix chips. The EXPO II timings are good, though I plan to try tightening things up ala BuildZoid at Actually Hardcore Overclocking.
The Samsung 32" Neo G7 isn't a part of the "build" per se, but deserves mention because all the effort we put in to a PC in the end is experienced via what we see on our monitor. The NEO G7 has a Mini LED local dimming feature with 1,196 zones, which means HDR is better than about anything than an OLED screen - which I would not buy for a general use PC due to burn-in. The 165Hz refresh rate, deep blacks, excellent color gamut and accuracy, etc. are top notch. Some might not like the curved screen, and honestly if they had a same spec 32'' flat version I would have preferred that, but it really has not been a problem for me.
Assembly
The build itself was pretty straight forward, though I was surprised that the most time consuming issue was figuring out all the RGB cabling (Three RGB fans on the radiator, three more on the front of the case, one rear exhaust, one on the AIO pump, and 3 built into the case). I settled on eschewing use of the RGB controller included in the case, and going with everything connected to the motherboard. I still need to order an RGB splitter cable due to being one connection short of what could be accommodated even with daisy chaining and using all three Motherboard RGB headers. The built in case RGB strip LEDS are therefore not functioning till I get the splitter.
The G500A is quite easy to build with, it's the nicest case I have used. I appreciated the "no need for a sharp bend" space between the 4080 power cable and the front glass and the clever "hatch" with sliding cover for that cable to disappear into rather than the usual longer routing path of other cases. Though appearance has nothing to do with how well a PC functions, it is still a source of pleasure to those of us who are aficionados. I still need to get that final case RGB working, and do a final cable management (replace those bread bag twisty thingies with neat zip ties). Cable management is a non-issue with the depth available and the generous tie-down locations.
My best advice is to follow the woodworking axiom - "Measure twice, cut once". In other words take your time and think it through at each step. Most assembly errors can be fixed, though a ruined motherboard or CPU can be painful lessons.
Setup
After firing the rig up and booting to a USB stick to install Windows 11, I ran in to a dead end when the install routine could not connect to the internet and gave no options to proceed. I tried several things to no avail. Thankfully googled the solution on my phone, which was :
1. Use the “Shift + F10” keyboard shortcut.
2. In Command Prompt, type the OOBE\BYPASSNRO command to bypass network requirements on Windows 11 and press Enter.
3. Click the “Continue with limited setup” option.
I was surprised how quickly Windows installed from that point, and even more surprised that immediately upon Windows opening, the Asus "Amoury Crate" install window popped up offering to install the needed Intel LAN driver as well. Honestly, I may have not ever have installed Armoury Crate otherwise, assuming it was just another bloatware gimmick. After clicking to install, poof, the internet was connected, and Armoury Crate also had options to install/update all the other drivers (chipset, graphics, audio, wi-fi, and bluetooth) - as well as some options for useful utilities (I picked WinRAR, Two-way AI noise cancellation, and CPUID ROG CPU-Z).
Sure, I could have done all this manually the old fashioned way, but it really was slick and saved a ton of time. Beyond the initial setup assistance, I was impressed with it's monitoring and variety of other features. It also proved to be very handy as a controller for all the RGB and effects in a simple but useful interface.
After installing my most used applications, I was ready to begin setting up Steam and a bunch of games I had from my old rig on the trusty rusty hard drive. that proved to be another problem, as after doing the Steam " add another Library location" pointing to that drive, Steam would not find the gamed and despite repeated efforts, continued to show all my gamed as needing to be downloading and installed (which I did not want to go through with all the time and waste of bandwidth that entailed). After looking up several fixes (which included a laborious process such as modifying the Appmanifest file and individually identifying the Steam APPID number of each game), I decided to try a simple gambit.
Since Steam had created a new empty "Steam Library" folder on the drive, I deleted that, and renamed the folder containing my games to "Steam Library", and restarted Steam. It worked and all my games were ready to go.
I did subsequently relocate a few of my favorite games to the NVME drive to benefit from the very fast loading. For me, that currently includes Red Dead Redemption 2, Elden Ring, and Hogwarts Legacy.
Having things basically working, I ran Cinebench in conjunction with HWiNFO64 to monitor temps, core frequencies, voltages, watts, etc.. The results were pretty good, with a multi-core score of over 28,000. I was seeing thermal throttling. All in all not a bad start at all stock settings. I then flashed to the latest bios version, and tried going with the EXPO II memory setting, which should bump things up considerably to rated speed and timings. This booted and ran without a hiccup.
I then experimented with a few overclocking features (PBO, curve optimizer, and ECO modes) to see how each balanced performance, power consumption, and temps, Nothing I tried caused a crash at any time. I then went with the simplest overclock approach - just using EXPO II and setting Core Ratio to AI Optimized. The outcome was great - a combination of strong Cinebench Single Core (over 2000) and Multi Core (over 30,000) scores. Just as importantly, the temps were a bit lower (86.5 C), no thermal throttling and good voltages.
I have to give Asus kudos on just how smart that AI Optimized setting is, unlike manual overclock methods that tend to make you choose between single core or multicore performance, it's dynamic algorithms manage to to give you optimal level performance for both. Here is a YouTube link on the topic (Ignore that the title says ROG X670E - it's exactly the same with the Strix B650E-E):
How to use AI Overclocking on an ROG X670E Motherboard for Ryzen CPUs
Summary
You may have had the sinking feeling of disappointment and frustration when a new rig has failures to boot, system crashes, and underwhelming performance after spending hard earned money and all the time and effort in planning, ordering, assembling, and setting up. Fortunately, I am happy - very happy - with this PC. The general feel is perceptively quite snappy and responsive, and tasks seem to complete in no time. It rips through games at 4K like nobody's business with gorgeous visuals. And of course watching streaming like Netflix or ripped 4K content is a treat.
I hope these impressions and hands on thoughts are helpful to someone contemplating their next build. Have fun
Last edited: