[SOLVED] Building my PC for the first time - any tips??

Jan 8, 2022
13
0
10
Hi

I'm planing to build my PC by myself for the first time and would like to ask a few questions to make sure that I don't miss anything important before I press 'On' button. In general I'm quite familiar with computer hardware/software and I owned many computers in last 30 years and what I normally do for brand new PC is buying all components and go to professional who set up everything for me. But this time I would like to try to put everything together by myself and hopefully it will work. Btw, I've have never for example install processor with cooling system, but I replaced by myself GPU, memory, SSD and so on.

The new system will contain:
  • Motherboard AsRock H670M-ITX/ax
  • CPU Intel i512400 (non-K) + stock fan
  • Memory 1 x Crucial DDR4-3200 Udimm 1.2v 16GB
  • SSD 2TB
  • PSU Corsair CX750
  • GPU Palit GTX1660 6GB PCIe 3.0
  • DVD drive
During installation I'm going to wear an anti static wristband connected to non painted part of PC case.

So the main questions are:

1) after when I assembly everything together and turn On the computer, do I need to change anything in Bios to make sure that computer will run smoothly? Or do I just leave all settings as they are?

2) If for example I'll leave all the setting on default, how do I know that these settings are safe for my PC? How do I know that these settings are optimal?

3) Do I see any welcome screen like you see in Windows for example, where you need to setup some settings, or do I just see black screen with information that Boot drive hasn't been found and than I'll need to install Windows?

4) The stock fan already comes with thermal paste on it, so as far as I know I don't need to add any more?

5) When installing CPU, do you simply lay it in the socket or do you need to push it down a little bit?

6) Do I need to instal CPU after when the motherboard will be screw down to the case or before?

7) Do I need to place anything between the motherboard and the case where the mounting screws are? Let's say a piece on insulating (electrical) tape, so the motherboard isn't screw down directly to the hard metal.

Any other important tips about what to do and what to avoid?

I've got familiarised myself about wiring connections on motherboard, to pay attention to +,- signs, and also to use an 8-pin plug from PSU to GPU and so on. I'm also not going to touch any part of CPU socket and CPU underneath to avoid static charge. I'm also not going to do any overclocking whatsoever.

Any suggestions appreciated.

Thanks
Lucas
 
Solution
1) I usually don't put the board/CPU RAM in the case until I assemble most stuff together on a bench first (outside the case). That way you'll know if there's a problem before you have everything in the case...

4) No. The TIM on the cooler is fine.

5) Just gently lay it in the socket. When you close and clamp the pressure plate the proper pressure will be applied to the CPU.

6) I like to assemble the board, CPU/cooler/RAM before I put the components in the case. I usually install the PSU first* and plug in the power cable. Leave the switch off, of course. That way the case is grounded and there's not need for the wrist strap. But it won't hurt to wear it.
* Also, you don't have to worry about dropping the PSU on the board. (I...
1) I usually don't put the board/CPU RAM in the case until I assemble most stuff together on a bench first (outside the case). That way you'll know if there's a problem before you have everything in the case...

4) No. The TIM on the cooler is fine.

5) Just gently lay it in the socket. When you close and clamp the pressure plate the proper pressure will be applied to the CPU.

6) I like to assemble the board, CPU/cooler/RAM before I put the components in the case. I usually install the PSU first* and plug in the power cable. Leave the switch off, of course. That way the case is grounded and there's not need for the wrist strap. But it won't hurt to wear it.
* Also, you don't have to worry about dropping the PSU on the board. (I build with the case laying on its back)

7) No. The idea of the standoffs is to ground the board to the system ground while elevating the baord from the case to avoid grounding out any solder points on the back.
 
Last edited:
Solution
1) after when I assembly everything together and turn On the computer, do I need to change anything in Bios to make sure that computer will run smoothly? Or do I just leave all settings as they are?

2) If for example I'll leave all the setting on default, how do I know that these settings are safe for my PC? How do I know that these settings are optimal?
Go in just to make sure that RAM and the storage drives are detected. I would say leave the settings on default until you've installed the OS. This way if you encounter any issues, it won't be from whatever settings you mucked with. Once you feel the OS works without a problem, then go and mess with the BIOS settings (the OS generally doesn't care what happens here)

Default settings are safe because either the hardware itself will run at the parameters it knows about (such as the CPU) or the settings must be supported by the hardware at the minimum (such as RAM).

3) Do I see any welcome screen like you see in Windows for example, where you need to setup some settings, or do I just see black screen with information that Boot drive hasn't been found and than I'll need to install Windows?
You have to install Windows. However if you booted with a USB thumb drive configured to be a Windows installer (use Microsoft's Media Creation Tool), then it should boot into that.

4) The stock fan already comes with thermal paste on it, so as far as I know I don't need to add any more?
If you mean the heat sink, then you don't need to do anything.

5) When installing CPU, do you simply lay it in the socket or do you need to push it down a little bit?
There's an alignment triangle on one of the corners of the processor, line that up with a matching triangle on the socket, then lay it straight down.

6) Do I need to instal CPU after when the motherboard will be screw down to the case or before?
It doesn't really matter, but motherboard outside of the case provides the most freedom of movement to work with. Once the CPU is latched into the socket, it's not moving anywhere.

7) Do I need to place anything between the motherboard and the case where the mounting screws are? Let's say a piece on insulating (electrical) tape, so the motherboard isn't screw down directly to the hard metal.
The case should have standoffs (they look like hexagonal pieces with a screw on one side and a screw receptacle on the other). Install the standoffs first before the motherboard if they weren't installed already

Any other important tips about what to do and what to avoid?
Ground yourself: https://www.wikihow.com/Ground-Yourself-to-Avoid-Destroying-a-Computer-with-Electrostatic-Discharge

Quick and dirty list:
  • Avoid working on carpet if possible
  • Avoid wearing fabric that's prone to static build up (like wool and fleece)
  • Humidify the workspace if possible if it's dry
  • You can discharge static by touching something metal that has a ground pin plugged in. This is the bare minimum, but ideally you should use a grounding strap.
 
Memory; you've chosen a single 16 gb stick; most would tell you to buy a kit of 2 identical 8 gb sticks.

Case; I don't see one in your parts list.

SSD: you might consider 2 of them. Big and little. Little for the OS and apps; Big for your personal data. An optional technique.

You might get some questioning on that PSU.

Do you intend to back up anything? If yes, to where?

Q1; on the first boot, you're just hoping to get a display on the monitor that hopefully continues on beyond that into Windows. You can go into the BIOS on the first boot if you want, but defaults aren't going to explode anything.

Q4; thermal paste; use what is supplied only, but monitor temps. You may as well order a small tube of good paste in case you need it later.

CPU should just about fall into the socket; it will not install if rotated to wrong orientation. Very little pressure.

Normally, you'd install CPU and cooler before putting the board in the case.

The board will lay on top of "standoffs" that are supplied with the case. Typically 6 to 10 of them, packaged separately. Attach to the 4 corners and various points elsewhere. You then apply screws through the motherboard that go directly into the internal threads of the standoffs. No need for tape.
 
Love those ITX builds.
What is your case? Some might require a smaller SFX psu.
Few cases these days have provision for a dvd drive.

As above, you are leaving performance on the table with a single stick of ram. It will run in single channel mode.
Buy a 2 x 8gb kit. And, do not think you are smart in planning to upgrade to 32gb later.
Ram must be matched for proper operation. Adding later may not work.
If you will ever want 32gb, buy a 2 x 16gb kit up front.

To address your questions:

1) / 2) Default settings are usually fine. It is easy to change things later.
For example, do you or do you not want to allow the keyboard to wake up the pc?
With cats in the house, you might not.
A good thing to do is to cycle through all of the options, not changing any. If you have a question about one, use google to research it.

3) If you hit DEL or F2 repeatedly while powering on, you will see the initial bios screen.

4) The stock cooler will have pre applied paste. But, it might be useful to have a tube of paste handy in case you want to remount the cooler.
See my stock text on mounting an intel stock cooler at the end.

5) VERY IMPORTANT! Orient the processor carefully using the notches and simply drop it in to the socket.
If you need to smoosh it around to seat it, you will damage some socket pins with unpredictable results.
Ram issues are common.
Such pin damage can possibly be corrected, but it is not an accepted cause for a RMA return.

6) Install the cpu, cooler, and ram with the motherboard outside of the case.

7) No, the screws are important to ground the motherboard to the case.

I would not be overly concerned about static charge. Touch the case occasionally to discharge static.
Do not shuffle your feet on a carpet and stuff like that.
Only of your environment is prone to generating static would I bother to wear a strap.

MY build process:

Before anything, while waiting for your parts to be delivered, download
and read, cover to cover your case and motherboard manual.
Buy a long #2 magnetic tip philips screwdriver.
A small led flashlight is also useful.

I find it handy to buy a power switch like this for testing.
https://www.newegg.com/p/N82E16812119009?Description=power switch&cm_re=power_switch--12-119-009--Product&quicklink=true
1. I assemble the critical parts outside of the case.
That lets me test them for functionality easily.
A wood table or cardboard is fine.
2. Plug in only the necessary parts at first. Ram, cpu, cooler, psu.
Do not force anything. Parts fit only one way.
Attach a monitor to the integrated motherboard adapter if you have one, otherwise to the graphics card.
  1. If your motherboard does not have a PWR button, momentarily touch the two pwr front panel pins with a flat blade screwdriver.
  2. Repeatedly hit F2 or DEL, and that should get you into the bios display.
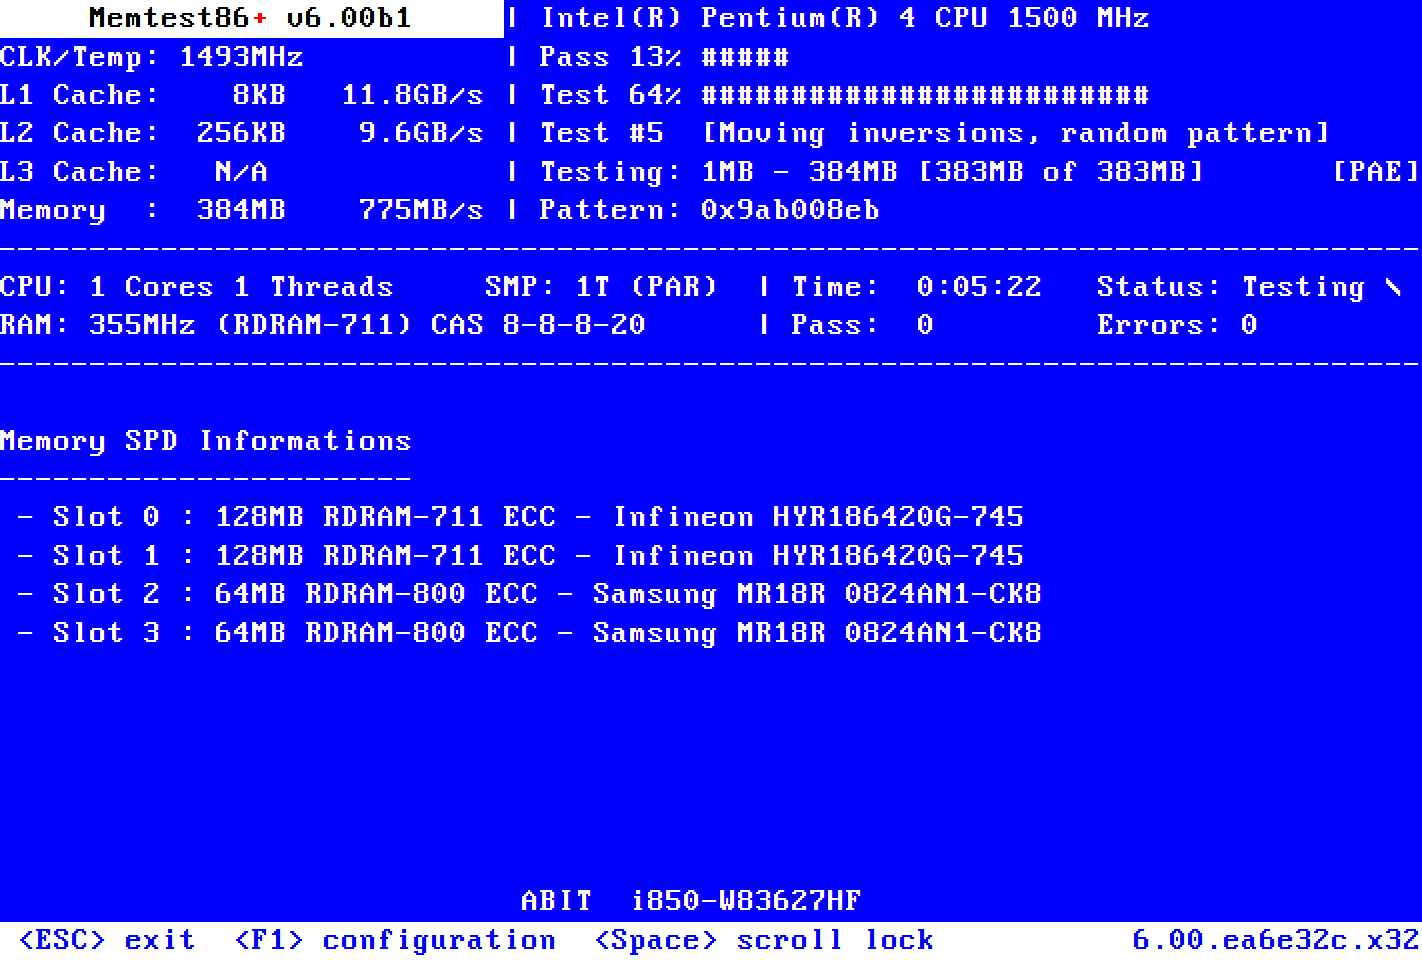
  3. Boot from a cd or usb stick with memtest86 on it. memtest will exercise your ram and cpu functionality.
They boot from a usb stick and do not use windows.
You can download them here:
If you can run a full pass with NO errors, your ram should be ok.

Running several more passes will sometimes uncover an issue, but it takes more time.
Probably not worth it unless you really suspect a ram issue.

  1. Install windows.
  2. Install the motherboard cd drivers. Particularly the lan drivers so you can access the internet.
Do not select the easy install option, or you will get a bunch of utilities and trialware that you don't want. Drivers only.
  1. Connect to the internet and install an antivirus program. Microsoft defender is free, easy, and unobtrusive.
  2. Install your graphics card and driver if you tested with integrated graphics.
You will need to remove the graphics card later to install your motherboard in the case.
As a tip when screwing the motherboard into the posts, give the screw a small counterclockwise turn until you feel a click.
That lets you know that the screw will engage properly.
Make a note of how the graphics card latches into the pcie slot.
The mechanism will be hidden under the card and may be difficult to work if you have not previously checked how.
  1. Update windows to currency.
  2. Only now do I take apart what I need to and install it in the case.
  3. Now is the time to reinstall your graphics card.
  4. Opinions vary on updating the bios. On a new build, I will update to currency right away. My thought is that I have no big loss if
I encounter a problem. Use the usb option, not the windows option.

----------------how to mount the stock Intel cooler--------------

The stock Intel cooler can be tricky to install.
A poor installation will result in higher cpu temperatures.
If properly mounted, you should expect temperatures at idle to be 10-15c. over ambient.

To mount the Intel stock cooler properly, place the motherboard on top of the foam or cardboard backing that was packed with the motherboard.
The stock cooler will come with paste pre applied, it looks like three grey strips.
The 4 push pins should come in the proper position for installation, that is with the pins rotated in the opposite direction of the arrow,(clockwise)
and pulled up as far as they can go.
Take the time to play with the pushpin mechanism until you know how they work.
Orient the 4 pins so that they are exactly over the motherboard holes.
If one is out of place, you will damage the pins which are delicate.
Push down on a DIAGONAL pair of pins at the same time. Then the other pair.
When you push down on the top black pins, it expands the white plastic pins to fix the cooler in place.
If you do them one at a time, you will not get the cooler on straight.
Lastly, look at the back of the motherboard to verify that all 4 pins are equally through the motherboard, and that the cooler is on firmly.
This last step must be done, which is why the motherboard should be out of the case to do the job. Or you need a case with a opening that lets you see the pins.
It is possible to mount the cooler with the motherboard mounted in the case, but you can then never be certain that the push pins are inserted properly
unless you can verify that the pins are through the motherboard and locked.

If you should need to remove the cooler, first run the cpu to heat it up and soften the paste before shutting down and powering off the pc. That makes it easy to unstick the old cooler.
Turn the pins counter clockwise to unlock them.
You will need to clean off the old paste and reapply new if you ever take the cooler off.
Clean off old paste with alcohol and a lint free paper like a coffee filter.
Apply new paste sparingly. A small rice sized drop in the center will spread our under heat and pressure.

It is hard to use too little.
----------------------------------------------------------------------------------
 
Last edited:
  • Like
Reactions: Lafong
Most people get or go way overboard on building a PC.
2 sticks of memory is about a must if your buying one with thoughts of adding another it's a crap shoot if it will work together.

Stock cooler I have heard Intel improved this with the 12xxx processors but never used one so don't know from all the other Intel processors it is even worth using or not.

Power supply I hope it's the newer gray label.

I have never used a static strap and have built several on a carpet floor just keep touching the case.

I stopped building the PC out of the case first about 50PC's ago because of almost 0 problems with DOA parts.

Put the cpu in in the right direction with the notches and arrow it's hard to screw up and no need to press on it the latch will be a bit hard to close and apply the pressure.

If your using more that one drive make sure to just have the one drive installed when you install the OS that you wish it to be installed on.

You can install the CPU and memory out of the case.
 
Hi

I'm planing to build my PC by myself for the first time and would like to ask a few questions to make sure that I don't miss anything important before I press 'On' button. In general I'm quite familiar with computer hardware/software and I owned many computers in last 30 years and what I normally do for brand new PC is buying all components and go to professional who set up everything for me. But this time I would like to try to put everything together by myself and hopefully it will work. Btw, I've have never for example install processor with cooling system, but I replaced by myself GPU, memory, SSD and so on.

The new system will contain:
  • Motherboard AsRock H670M-ITX/ax
  • CPU Intel i512400 (non-K) + stock fan
  • Memory 1 x Crucial DDR4-3200 Udimm 1.2v 16GB
  • SSD 2TB
  • PSU Corsair CX750
  • GPU Palit GTX1660 6GB PCIe 3.0
  • DVD drive
During installation I'm going to wear an anti static wristband connected to non painted part of PC case.

So the main questions are:

1) after when I assembly everything together and turn On the computer, do I need to change anything in Bios to make sure that computer will run smoothly? Or do I just leave all settings as they are?

2) If for example I'll leave all the setting on default, how do I know that these settings are safe for my PC? How do I know that these settings are optimal?

3) Do I see any welcome screen like you see in Windows for example, where you need to setup some settings, or do I just see black screen with information that Boot drive hasn't been found and than I'll need to install Windows?

4) The stock fan already comes with thermal paste on it, so as far as I know I don't need to add any more?

5) When installing CPU, do you simply lay it in the socket or do you need to push it down a little bit?

6) Do I need to instal CPU after when the motherboard will be screw down to the case or before?

7) Do I need to place anything between the motherboard and the case where the mounting screws are? Let's say a piece on insulating (electrical) tape, so the motherboard isn't screw down directly to the hard metal.

Any other important tips about what to do and what to avoid?

I've got familiarised myself about wiring connections on motherboard, to pay attention to +,- signs, and also to use an 8-pin plug from PSU to GPU and so on. I'm also not going to touch any part of CPU socket and CPU underneath to avoid static charge. I'm also not going to do any overclocking whatsoever.

Any suggestions appreciated.

Thanks
Lucas
No amd
 
1) I usually don't put the board/CPU RAM in the case until I assemble most stuff together on a bench first (outside the case). That way you'll know if there's a problem before you have everything in the case...

4) No. The TIM on the cooler is fine.

5) Just gently lay it in the socket. When you close and clamp the pressure plate the proper pressure will be applied to the CPU.

6) I like to assemble the board, CPU/cooler/RAM before I put the components in the case. I usually install the PSU first* and plug in the power cable. Leave the switch off, of course. That way the case is grounded and there's not need for the wrist strap. But it won't hurt to wear it.
* Also, you don't have to worry about dropping the PSU on the board. (I build with the case laying on its back)

7) No. The idea of the standoffs is to ground the board to the system ground while elevating the baord from the case to avoid grounding out any solder points on the back.
Thanks for all the tips. Especially about standoffs. I didn't know about of how important they are.
 
Love those ITX builds.
What is your case? Some might require a smaller SFX psu.
Few cases these days have provision for a dvd drive.

As above, you are leaving performance on the table with a single stick of ram. It will run in single channel mode.
Buy a 2 x 8gb kit. And, do not think you are smart in planning to upgrade to 32gb later.
Ram must be matched for proper operation. Adding later may not work.
If you will ever want 32gb, buy a 2 x 16gb kit up front.

To address your questions:

1) / 2) Default settings are usually fine. It is easy to change things later.
For example, do you or do you not want to allow the keyboard to wake up the pc?
With cats in the house, you might not.
A good thing to do is to cycle through all of the options, not changing any. If you have a question about one, use google to research it.

3) If you hit DEL or F2 repeatedly while powering on, you will see the initial bios screen.

4) The stock cooler will have pre applied paste. But, it might be useful to have a tube of paste handy in case you want to remount the cooler.
See my stock text on mounting an intel stock cooler at the end.

5) VERY IMPORTANT! Orient the processor carefully using the notches and simply drop it in to the socket.
If you need to smoosh it around to seat it, you will damage some socket pins with unpredictable results.
Ram issues are common.
Such pin damage can possibly be corrected, but it is not an accepted cause for a RMA return.

6) Install the cpu, cooler, and ram with the motherboard outside of the case.

7) No, the screws are important to ground the motherboard to the case.

I would not be overly concerned about static charge. Touch the case occasionally to discharge static.
Do not shuffle your feet on a carpet and stuff like that.
Only of your environment is prone to generating static would I bother to wear a strap.

MY build process:

Before anything, while waiting for your parts to be delivered, download
and read, cover to cover your case and motherboard manual.
Buy a long #2 magnetic tip philips screwdriver.
A small led flashlight is also useful.

I find it handy to buy a power switch like this for testing.
https://www.newegg.com/p/N82E16812119009?Description=power switch&cm_re=power_switch--12-119-009--Product&quicklink=true
1. I assemble the critical parts outside of the case.
That lets me test them for functionality easily.
A wood table or cardboard is fine.
2. Plug in only the necessary parts at first. Ram, cpu, cooler, psu.
Do not force anything. Parts fit only one way.
Attach a monitor to the integrated motherboard adapter if you have one, otherwise to the graphics card.
  1. If your motherboard does not have a PWR button, momentarily touch the two pwr front panel pins with a flat blade screwdriver.
  2. Repeatedly hit F2 or DEL, and that should get you into the bios display.
  3. Boot from a cd or usb stick with memtest86 on it. memtest will exercise your ram and cpu functionality.
They boot from a usb stick and do not use windows.
You can download them here:
If you can run a full pass with NO errors, your ram should be ok.

Running several more passes will sometimes uncover an issue, but it takes more time.
Probably not worth it unless you really suspect a ram issue.

  1. Install windows.
  2. Install the motherboard cd drivers. Particularly the lan drivers so you can access the internet.
Do not select the easy install option, or you will get a bunch of utilities and trialware that you don't want. Drivers only.
  1. Connect to the internet and install an antivirus program. Microsoft defender is free, easy, and unobtrusive.
  2. Install your graphics card and driver if you tested with integrated graphics.
You will need to remove the graphics card later to install your motherboard in the case.
As a tip when screwing the motherboard into the posts, give the screw a small counterclockwise turn until you feel a click.
That lets you know that the screw will engage properly.
Make a note of how the graphics card latches into the pcie slot.
The mechanism will be hidden under the card and may be difficult to work if you have not previously checked how.
  1. Update windows to currency.
  2. Only now do I take apart what I need to and install it in the case.
  3. Now is the time to reinstall your graphics card.
  4. Opinions vary on updating the bios. On a new build, I will update to currency right away. My thought is that I have no big loss if
I encounter a problem. Use the usb option, not the windows option.

----------------how to mount the stock Intel cooler--------------

The stock Intel cooler can be tricky to install.
A poor installation will result in higher cpu temperatures.
If properly mounted, you should expect temperatures at idle to be 10-15c. over ambient.

To mount the Intel stock cooler properly, place the motherboard on top of the foam or cardboard backing that was packed with the motherboard.
The stock cooler will come with paste pre applied, it looks like three grey strips.
The 4 push pins should come in the proper position for installation, that is with the pins rotated in the opposite direction of the arrow,(clockwise)
and pulled up as far as they can go.
Take the time to play with the pushpin mechanism until you know how they work.
Orient the 4 pins so that they are exactly over the motherboard holes.
If one is out of place, you will damage the pins which are delicate.
Push down on a DIAGONAL pair of pins at the same time. Then the other pair.
When you push down on the top black pins, it expands the white plastic pins to fix the cooler in place.
If you do them one at a time, you will not get the cooler on straight.
Lastly, look at the back of the motherboard to verify that all 4 pins are equally through the motherboard, and that the cooler is on firmly.
This last step must be done, which is why the motherboard should be out of the case to do the job. Or you need a case with a opening that lets you see the pins.
It is possible to mount the cooler with the motherboard mounted in the case, but you can then never be certain that the push pins are inserted properly
unless you can verify that the pins are through the motherboard and locked.

If you should need to remove the cooler, first run the cpu to heat it up and soften the paste before shutting down and powering off the pc. That makes it easy to unstick the old cooler.
Turn the pins counter clockwise to unlock them.
You will need to clean off the old paste and reapply new if you ever take the cooler off.
Clean off old paste with alcohol and a lint free paper like a coffee filter.
Apply new paste sparingly. A small rice sized drop in the center will spread our under heat and pressure.

It is hard to use too little.
----------------------------------------------------------------------------------
Thanks for the detail and important advices. I'm using mATX case and my new motherboard is Mini-ITX, so will fit. I only need to double check the standsoff, because it looks like my current (old) motherboard is not sitting on any standsoff. Motherboard sits quite close to the case, I mean quite low, and also I see a pieces of electrical tape sticking from behind, which suggest to me that someone previously coudn't fit a standsoffs for some reason and used insulating tape to create a safe barier between the motherboard and the case. I definitelly need to investigate this.
 
I see a pieces of electrical tape sticking from behind, which suggest to me that someone previously coudn't fit a standsoffs for some reason and used insulating tape to create a safe barier between the motherboard and the case. I definitelly need to investigate this.

Pretty sure you can buy standoffs by the bag, but I'm not sure if there is an industry standard such that you needn't worry about the standoff threads matching your case threads. You'd hope so.
 
Most people get or go way overboard on building a PC.
2 sticks of memory is about a must if your buying one with thoughts of adding another it's a crap shoot if it will work together.

Stock cooler I have heard Intel improved this with the 12xxx processors but never used one so don't know from all the other Intel processors it is even worth using or not.

Power supply I hope it's the newer gray label.

I have never used a static strap and have built several on a carpet floor just keep touching the case.

I stopped building the PC out of the case first about 50PC's ago because of almost 0 problems with DOA parts.

Put the cpu in in the right direction with the notches and arrow it's hard to screw up and no need to press on it the latch will be a bit hard to close and apply the pressure.

If your using more that one drive make sure to just have the one drive installed when you install the OS that you wish it to be installed on.

You can install the CPU and memory out of the case.
The PSU which I'm using has green CX, not the gray label. Do you think that green PSU shouldn't be used with my new motherboard? The motherboard's manual says only to use PSU 12v1 (8-pins) + 24-pin ATXPWR1. So as far as I know is should be fine. But I will double check this with AsRock customer support.
 
Everyone here has pretty much covered all of the bases. Static electricity is overrated though. Putting a strap to the case really won't do much for you if it isn't grounded too. The biggest thing I have ran into in the last couple of years is this. Never try to work a RAM clock above SPD (Default) settings before installing the OS. I have had multiple nightmare situations where people buy RAM that is rated on the package to an overclock and had people load up bios and just set it to the rated speed prior to OS load. If your RAM clock is unstable when you load the OS you will end up reloading it when it is stable and unfortunately it doesn't usually show up for a while if it is close. Install your OS with everything stock default unless there is a setting that is absolutely necessary (like boot drive parameters). You can dink with settings later, crash the machine and (usually) just put the settings back with no issues, but if you install OS on an unstable machine it will never be right until you reinstall on a stable build configuration. Defaults are generally safe.
 
Everyone here has pretty much covered all of the bases. Static electricity is overrated though. Putting a strap to the case really won't do much for you if it isn't grounded too. The biggest thing I have ran into in the last couple of years is this. Never try to work a RAM clock above SPD (Default) settings before installing the OS. I have had multiple nightmare situations where people buy RAM that is rated on the package to an overclock and had people load up bios and just set it to the rated speed prior to OS load. If your RAM clock is unstable when you load the OS you will end up reloading it when it is stable and unfortunately it doesn't usually show up for a while if it is close. Install your OS with everything stock default unless there is a setting that is absolutely necessary (like boot drive parameters). You can dink with settings later, crash the machine and (usually) just put the settings back with no issues, but if you install OS on an unstable machine it will never be right until you reinstall on a stable build configuration. Defaults are generally safe.
Thanks for comments. To be honest I'm planing to use my old ssd drive with Windows 10 already installed. I know that is better to install a fresh copy on Windows, but I have so much on this drive and it will take very long to reinstall everything from scratch. But I will install fresh Windows 11, so I will have access to both systems. Obviously is not guarenteed that old Windows 10 will start on new motherboard, but if I set up Windows correctly, there is a big chance that I will be able to use the old system
 
Thanks for comments. To be honest I'm planing to use my old ssd drive with Windows 10 already installed. I know that is better to install a fresh copy on Windows, but I have so much on this drive and it will take very long to reinstall everything from scratch. But I will install fresh Windows 11, so I will have access to both systems. Obviously is not guarenteed that old Windows 10 will start on new motherboard, but if I set up Windows correctly, there is a big chance that I will be able to use the old system
Your plan to use a preinstalled version of windows is not a good idea. First off when you install windows certain things are setup to the hardware configuration that are difficult or almost impossible to correctly reconfigure afterwards, this includes drivers, BIOS subsystems and security integration like TPM. Second the windows activation binds itself to the cpu/motherboard serial numbers. When it is changed your activation will be invalidated. While it may not be impossible to get Microsoft to change it over (depending on the license you own) it swings between a royal pain and impossible. When building a new machine I always just plan on purchasing a new OEM license of the current OS and reinstalling all software clean. I know this sounds like a lot more work but the machine will never really run right even if you can get it to validate until you clean install. With this in mind I would strongly look at Windows 11.