


Hey all! Just wanted to share what I’ve been trying to do the past few days.
I have two PS3s, one Fat model the other slim. Both died a few years back from YLOD.
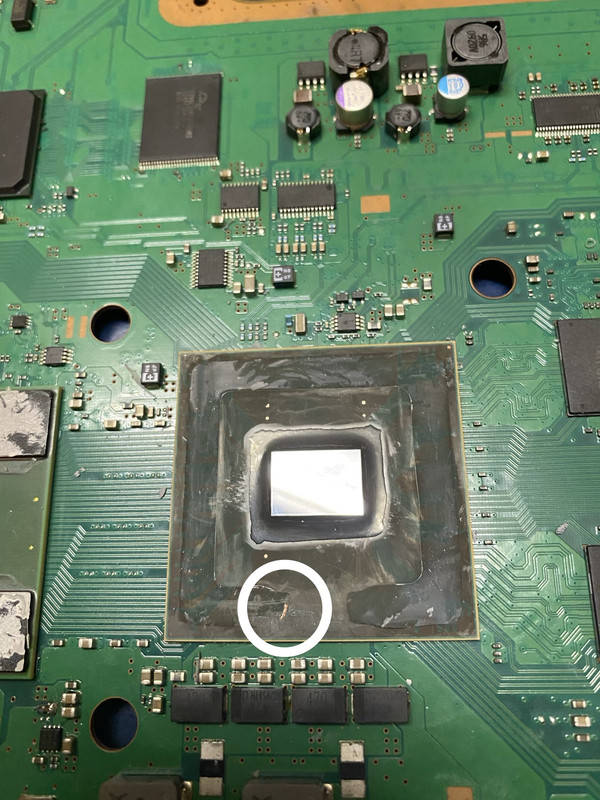
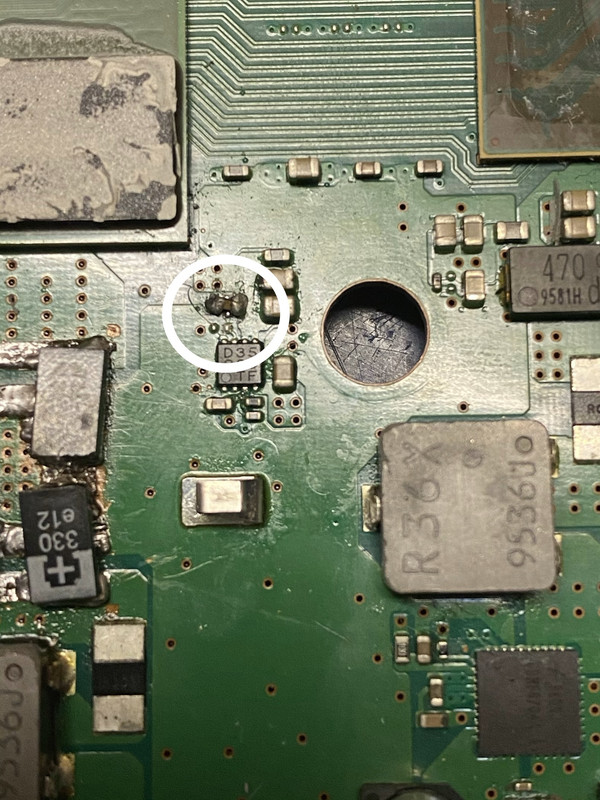
I tried fixing the Fat model a few years ago by the then accepted method of reballing the RSX chip (actually just heated it up with a heat gun). That worked. But! I then attempted to delid both the Cell and the RSX; which ended in utter failure... I broke off one of the small SMDs on the RSX.
I never attempted to touch the slim PS3 after, Until now.
I discovered this about a week ago: https://www.psx-place.com/threads/tutorial-nec-tokin-capacitors-replacement-ylod-fix.25260/
I know that thread is about a year old, but the theory is, the reason why PS3s keep failing is not entirely due to the solder balls of the RSX cracking. It is in fact due to one of the NEC/Tokin capacitors failing. Heat just brings them to life temporarily. The solution was to replace them with tantalum caps.
4 tantalums are needed per Tokin. If you replace all caps with tantalums, you would have to solder in a jumper wire. Usually the bottom ones need replacing first.
It made so much sense, as I had an old Toshiba laptop with one of those Tokins and when it stopped working, the PC repair shop just replaced it with tantalums.
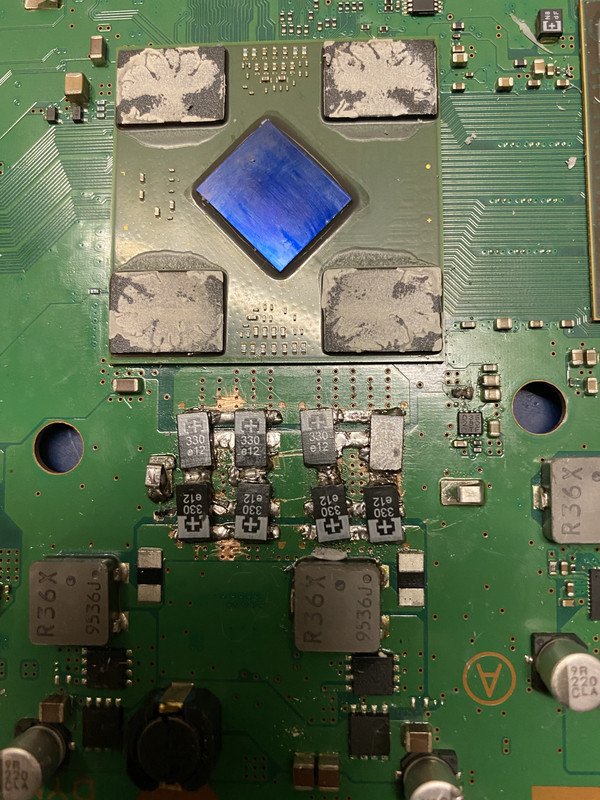
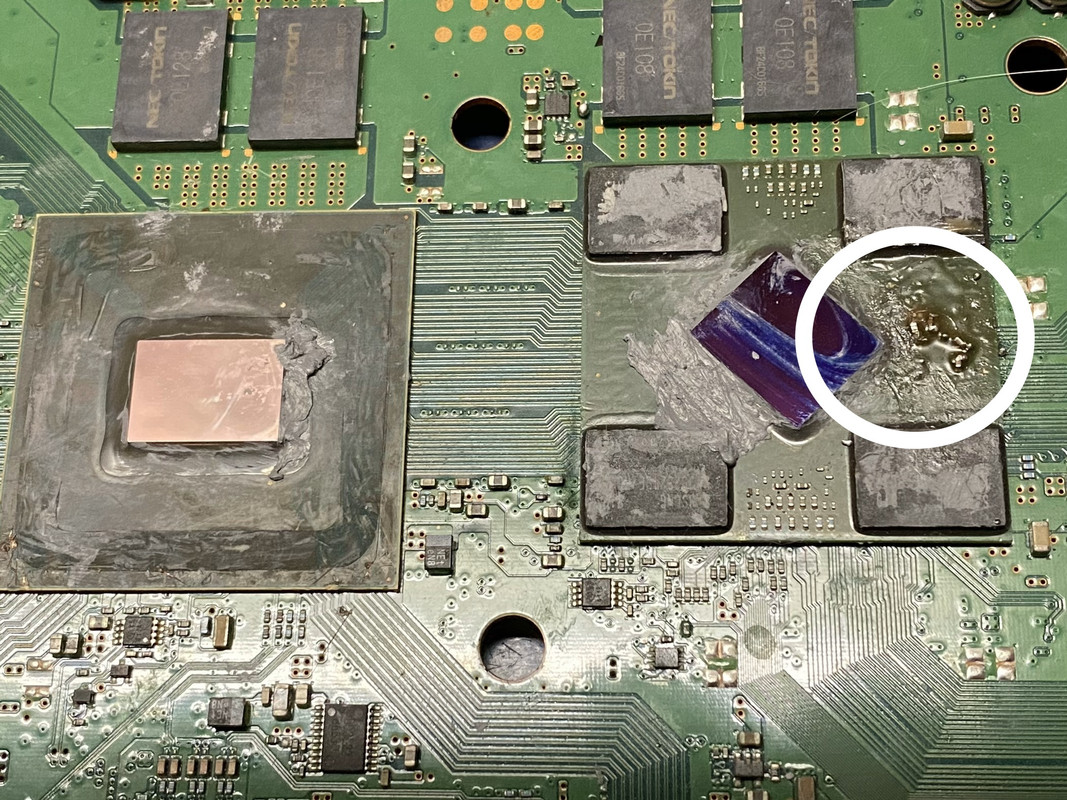
So in order to test if that truly is the solution, I bought myself some 330uf tantalum caps, and ripped off the old tokin caps with a flat blade screwdriver.
The only problem is I don’t have a rework station. So I tried to solder them with a regular soldering iron:
(It was so difficult trying to upload this photo, Im posting using my iPhone currently. I tried iCloud share, Google Photos, Drive. Thankfully postimage worked.)
Surprisingly, the PS3 worked. It turned on, and left it at idle for about 30 minutes and it didn’t fail (yet).
I know that the soldering might just be the worst in the world! I just did that to see if it would actually work, and just buy the rework station and do it properly if it did work.
And, I also misread the thread at psx-place. They said to do the bottom caps first; the one where the chips aren’t visible; I did the top ones. Guess I got lucky...
I’ll still be replacing the other caps and redoing the ones I installed once the rework station arrives. Maybe I could also use the rework station to re solder the SMDs of the fat PS3 .
Really such a shame that a lot of people I know just threw these away cause it would just keep failing even after “reflowing” the RSX multiple times... not knowing that we were just zombiefying the caps.
So thats about it, thanks for reading about my little boredom fueled project.
EDIT:
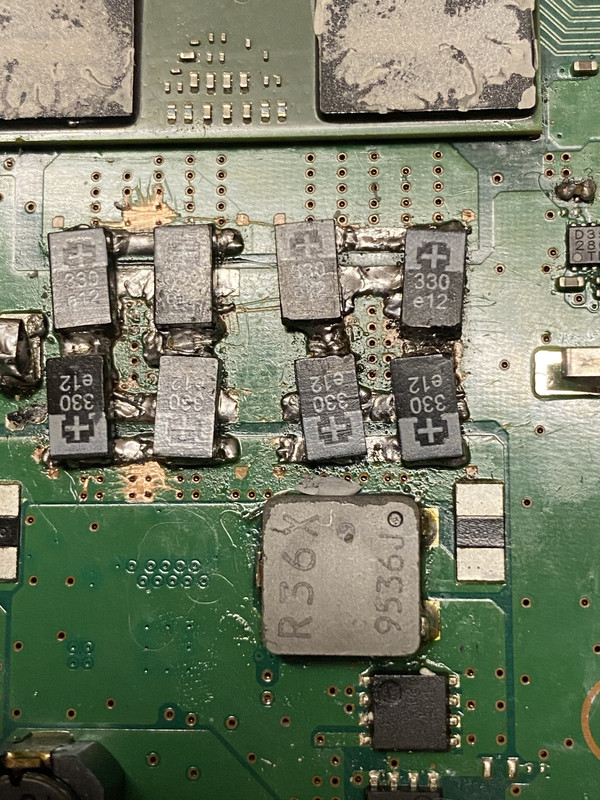
Just a few closer shots of the tantalums:
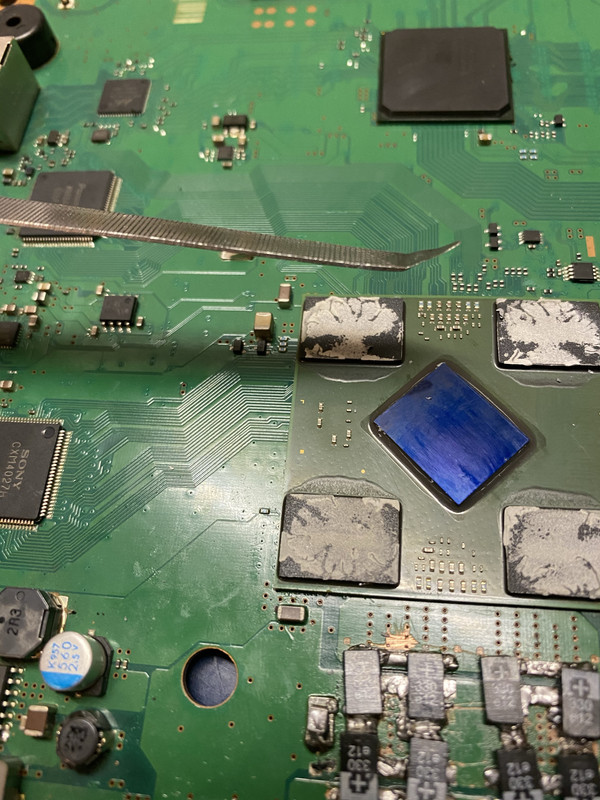
If anyones wondering why I scratched the top and bottom part of the pcb:

I was supposed to solder on the “jumper wire” there but I remembered that I left the two Tokins on the other side, so it wont be needed yet.
I have two PS3s, one Fat model the other slim. Both died a few years back from YLOD.
I tried fixing the Fat model a few years ago by the then accepted method of reballing the RSX chip (actually just heated it up with a heat gun). That worked. But! I then attempted to delid both the Cell and the RSX; which ended in utter failure... I broke off one of the small SMDs on the RSX.
I never attempted to touch the slim PS3 after, Until now.
I discovered this about a week ago: https://www.psx-place.com/threads/tutorial-nec-tokin-capacitors-replacement-ylod-fix.25260/
I know that thread is about a year old, but the theory is, the reason why PS3s keep failing is not entirely due to the solder balls of the RSX cracking. It is in fact due to one of the NEC/Tokin capacitors failing. Heat just brings them to life temporarily. The solution was to replace them with tantalum caps.
4 tantalums are needed per Tokin. If you replace all caps with tantalums, you would have to solder in a jumper wire. Usually the bottom ones need replacing first.
It made so much sense, as I had an old Toshiba laptop with one of those Tokins and when it stopped working, the PC repair shop just replaced it with tantalums.
So in order to test if that truly is the solution, I bought myself some 330uf tantalum caps, and ripped off the old tokin caps with a flat blade screwdriver.
The only problem is I don’t have a rework station. So I tried to solder them with a regular soldering iron:
(It was so difficult trying to upload this photo, Im posting using my iPhone currently. I tried iCloud share, Google Photos, Drive. Thankfully postimage worked.)
Surprisingly, the PS3 worked. It turned on, and left it at idle for about 30 minutes and it didn’t fail (yet).
I know that the soldering might just be the worst in the world! I just did that to see if it would actually work, and just buy the rework station and do it properly if it did work.
And, I also misread the thread at psx-place. They said to do the bottom caps first; the one where the chips aren’t visible; I did the top ones. Guess I got lucky...
I’ll still be replacing the other caps and redoing the ones I installed once the rework station arrives. Maybe I could also use the rework station to re solder the SMDs of the fat PS3 .
Really such a shame that a lot of people I know just threw these away cause it would just keep failing even after “reflowing” the RSX multiple times... not knowing that we were just zombiefying the caps.
So thats about it, thanks for reading about my little boredom fueled project.
EDIT:
Just a few closer shots of the tantalums:
If anyones wondering why I scratched the top and bottom part of the pcb:
I was supposed to solder on the “jumper wire” there but I remembered that I left the two Tokins on the other side, so it wont be needed yet.
Last edited:
 Twitter