Question Ryzen 1700x + GTX 1070 issues

Jul 15, 2019
9
0
10
Hey Guys,

Am trying not to lose all my hair over this. So far couldn't find a single reason as to why this is happening.

My Build is.
Asus Crosshair VI Hero.
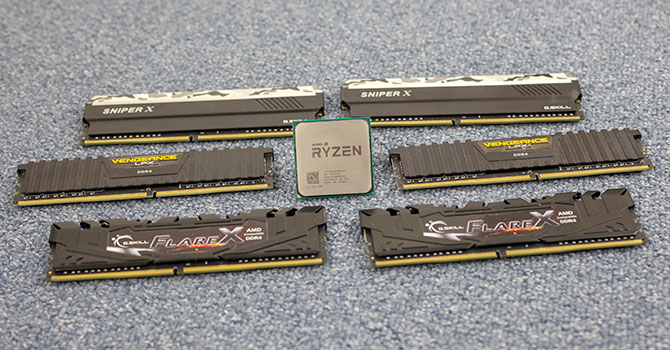
Ryzen 1700x.
2x8GB G.Skill DDR4 3200MHZ.
GTX 1070.
256GB Samsung Evo SSD.
Close to 12TB on 6 HDD.
Acer Predator monitor (1440p, 144hz).

My issue is.
Frequent frame drops in game.
Overall windows feeling laggy.

I tried.
OC both graphics and processor.
Not successful in Processor OC.
Games play decently in Graphics OC.
RAM is running at 2133MHZ even after changing the profile.

Also, Default idle temp is around 43C. Am not sure why its so high recently. I used to have an idle temp of less than 20 earlier.

Please help!!

TIA
 
Last edited:
I guess the first things would be:
•Getting RAM to full speed. DDR4-2133 is the default DDR4 speed. To increase it, go to your BIOS, and open the Extreme Tweaker Menu. Now, under Memory Frequency, if DDR4-3200MHz is available then choose it. If not, then go through AI Overclock Tuner, and work through the DOCP settings. First choose 1, then see if you can set it to 3200MHz, then choose 2, then 3 until you can get 3200MHz.
•Run a virus scan. I'd recommend using Malwarebytes (it's free), and finds most nasty things, better than Avast, AVG etc. Quarantine or delete anything it finds.
•Click start, search Defrag, and choose defragment and optimise drives. Analyse all of your HDDs, and then optimise them if they are fragmented (it'll give you a %fragmented). Do not do this on your SSD, only do it on HDDs.
 
Jul 15, 2019
9
0
10
I guess the first things would be:
•Getting RAM to full speed. DDR4-2133 is the default DDR4 speed. To increase it, go to your BIOS, and open the Extreme Tweaker Menu. Now, under Memory Frequency, if DDR4-3200MHz is available then choose it. If not, then go through AI Overclock Tuner, and work through the DOCP settings. First choose 1, then see if you can set it to 3200MHz, then choose 2, then 3 until you can get 3200MHz.
•Run a virus scan. I'd recommend using Malwarebytes (it's free), and finds most nasty things, better than Avast, AVG etc. Quarantine or delete anything it finds.
•Click start, search Defrag, and choose defragment and optimise drives. Analyse all of your HDDs, and then optimise them if they are fragmented (it'll give you a %fragmented). Do not do this on your SSD, only do it on HDDs.

I already tried to change the frequency to 3200MHZ using Overclock Tuner, Predefined profiles and Manual. Its still showing as 2133MHZ.
Entire system has been scanned for Malware and any other viruses. I use Bitdefender for AV and IS.
I havent done the Defragmentation. Ill do that.
 
Jul 15, 2019
9
0
10
I would highly recommend that you update to BIOS version 7106, as you are on a BIOS version that has at least 8 newer versions than it that have been released, many of which directly relate to memory performance and compatibility.

You only need the latest version, not every version in between.

Okay. So I tried updating the bios using USB drive. Now stuck with Blackscreen.
 
Pretty hard to bork a BIOS update these days. Did you kill the power before the update was done? What method did you use to update?

Have you tried resetting by removing the CMOS battery?

You realize that board has BIOS Flashback? You don't even need a CPU installed to flash the BIOS. If you used BIOS flashback, did you use the BIOS renamer to rename the file to C6H.CAP ?

If not, you should watch some online tutorials on using BIOS flashback on your board, then download the correct BIOS version, rename it to C6H.CAP (Requires BIOS renamer available from ASUS website) and then insert the flash drive in the correct USB port for use with BIOS flashback and push the BIOS flashback button for three seconds. As seen here:

148q5aa.jpg
 
  • Like
Reactions: ConanLock
Jul 15, 2019
9
0
10
Pretty hard to bork a BIOS update these days. Did you kill the power before the update was done? What method did you use to update?

Have you tried resetting by removing the CMOS battery?

You realize that board has BIOS Flashback? You don't even need a CPU installed to flash the BIOS. If you used BIOS flashback, did you use the BIOS renamer to rename the file to C6H.CAP ?

If not, you should watch some online tutorials on using BIOS flashback on your board, then download the correct BIOS version, rename it to C6H.CAP (Requires BIOS renamer available from ASUS website) and then insert the flash drive in the correct USB port for use with BIOS flashback and push the BIOS flashback button for three seconds. As seen here:

148q5aa.jpg
The problem was with my drive that I was using the flash BIOS. Used another one and it worked fine.
But still the RAM stats show 2133MHZ even after applying the 3200MHZ profile.
 
And which slots are your memory modules installed in? If they are not already, they should be installed in the A2 and B2 slots which are the second and fourth slots over from the CPU socket.

If they are not in those DIMM slots, I would move them to those slots and then reset the CMOS as follows:

Power off the unit, switch the PSU off and unplug the PSU cord from either the wall or the power supply.

Remove the motherboard CMOS battery for five minutes. In some cases it may be necessary to remove the graphics card to access the CMOS battery.

During that five minutes, press the power button on the case for 30 seconds. After the five minutes is up, reinstall the CMOS battery making sure to insert it with the correct side up just as it came out.

If you had to remove the graphics card you can now reinstall it, but remember to reconnect your power cables if there were any attached to it as well as your display cable.

Now, plug the power supply cable back in, switch the PSU back on and power up the system. It should display the POST screen and the options to enter CMOS/BIOS setup. Enter the bios setup program and reconfigure the boot settings for either the Windows boot manager or for legacy systems, the drive your OS is installed on if necessary.

Save settings and exit. If the system will POST and boot then you can move forward from there including going back into the bios and trying again to set the Memory XMP or DOCP profile settings. You may also want to reset any custom fan profile settings or other specific settings you may have previously had configured that were wiped out by resetting the CMOS.

In some cases it may be necessary when you go into the BIOS after a reset, to load the Optimal default or Default values and then save settings, to actually get the hardware tables to reset in the boot manager.
 
So, you may have to set the memory configuration manually. I'd try setting the speed manually to 3200mhz with timings of 16-18-18-38 and 1.35-1.36v, save settings, exit, see if the settings stick. There may be an additional setting in the BIOS that must be changed in order for XMP/DOCP profiles or manual settings to "stick" or even be possible.
 
Jul 15, 2019
9
0
10
So, you may have to set the memory configuration manually. I'd try setting the speed manually to 3200mhz with timings of 16-18-18-38 and 1.35-1.36v, save settings, exit, see if the settings stick. There may be an additional setting in the BIOS that must be changed in order for XMP/DOCP profiles or manual settings to "stick" or even be possible.
I found a DOCP profile which allowed me to change the frequency and it worked. For half hour. Then Windows crashed. My windows and games are choppy and laggy now after the bios update. Did I do something wrong in the process?
 
After updating the BIOS, did you load the "Default settings" option IN the BIOS, and then save settings, and then go back in and configure all your custom settings like boot order and fan profiles?

WHICH profile did you choose?

Did you check to see that the DOCP profile settings matched the correct settings for your sticks. Are the four primary timings the same as what your kit is supposed to be set at?

I'd go back into the advanced memory settings and see if the timings for the currently loaded profile are set to 16-18-18-38 and check to see what the command rate is set to. If it is set to 1, try setting it to 2. If it is set to 2, try setting it to 1. The command rate should be visible within the advanced memory settings in the BIOS.

Probably the settings for the XMP profile on your sticks are Intel based settings, and you may need to configure the memory manually like I said before. You might also NEED to use the Ryzen calculator to find timings and speed settings that work with your sticks. You may also need to set the XMP profile, as an alternative, and then DROP the memory speed down one level to 3000 or 2933mhz.

Unfortunately, on 1st gen Ryzen, memory compatiblity and stability is not particularly good once you get past 2933mhz, even with recent BIOS versions.

Both the motherboards and CPUs from first Gen Ryzen struggle with certain sticks, ICs or settings.

Click here to download the Ryzen calculator


More information on tweaking Ryzen memory settings here:

 
Jul 15, 2019
9
0
10
After updating the BIOS, did you load the "Default settings" option IN the BIOS, and then save settings, and then go back in and configure all your custom settings like boot order and fan profiles?

WHICH profile did you choose?

Did you check to see that the DOCP profile settings matched the correct settings for your sticks. Are the four primary timings the same as what your kit is supposed to be set at?

I'd go back into the advanced memory settings and see if the timings for the currently loaded profile are set to 16-18-18-38 and check to see what the command rate is set to. If it is set to 1, try setting it to 2. If it is set to 2, try setting it to 1. The command rate should be visible within the advanced memory settings in the BIOS.

Probably the settings for the XMP profile on your sticks are Intel based settings, and you may need to configure the memory manually like I said before. You might also NEED to use the Ryzen calculator to find timings and speed settings that work with your sticks. You may also need to set the XMP profile, as an alternative, and then DROP the memory speed down one level to 3000 or 2933mhz.

Unfortunately, on 1st gen Ryzen, memory compatiblity and stability is not particularly good once you get past 2933mhz, even with recent BIOS versions.

Both the motherboards and CPUs from first Gen Ryzen struggle with certain sticks, ICs or settings.

Click here to download the Ryzen calculator


More information on tweaking Ryzen memory settings here:

Damn thanks man! Ill go through this and will update the forum!
 
Jul 15, 2019
9
0
10
Hello!!

I have reinstalled windows on a SSD and have updated the XMP profile as well.

Its still the same. Windows itself freezes and mouse movement lags a lot.

Please help!!